If you're looking to start trading gold but don't know where to begin, this guide will walk you through the entire process. Simply follow each step in order, and within a few minutes you'll have everything you need — plus complimentary DaraForex VIP access.

Step 1: Open an Exness Account
The first thing you need is a forex broker. We recommend Exness because of its instant deposits and withdrawals, competitive trading conditions, beginner-friendly platform, and reliable trading environment.
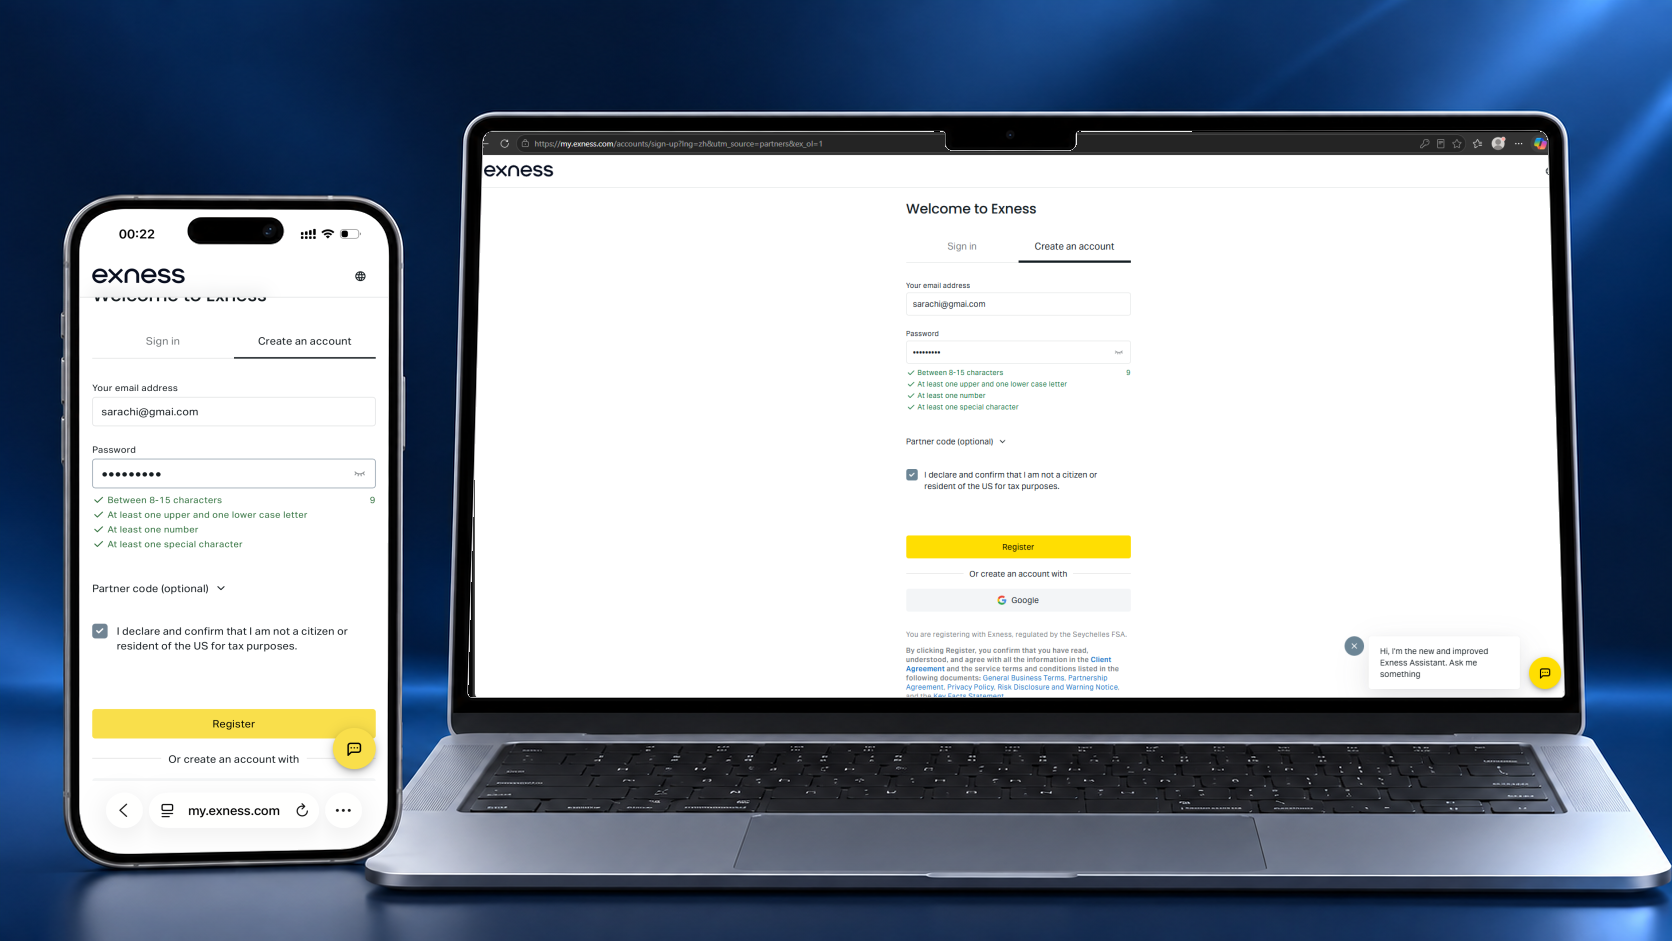
Go to the VIP qualification page and click "Open an account via EXNESS". Opening through our link is essential: it attaches the account to your DaraForex profile so VIP access can be verified automatically.
Simply register using your email address, create your password, and complete the registration process. Once you've successfully created your account, you're ready for the next step.
Step 2: Create Your Real Trading Account
Now that you've successfully created your Exness account, it's time to create your Real Trading Account — the account you'll use to trade with real money.
Navigate to your Exness Personal Area. After logging in, click "Open account".
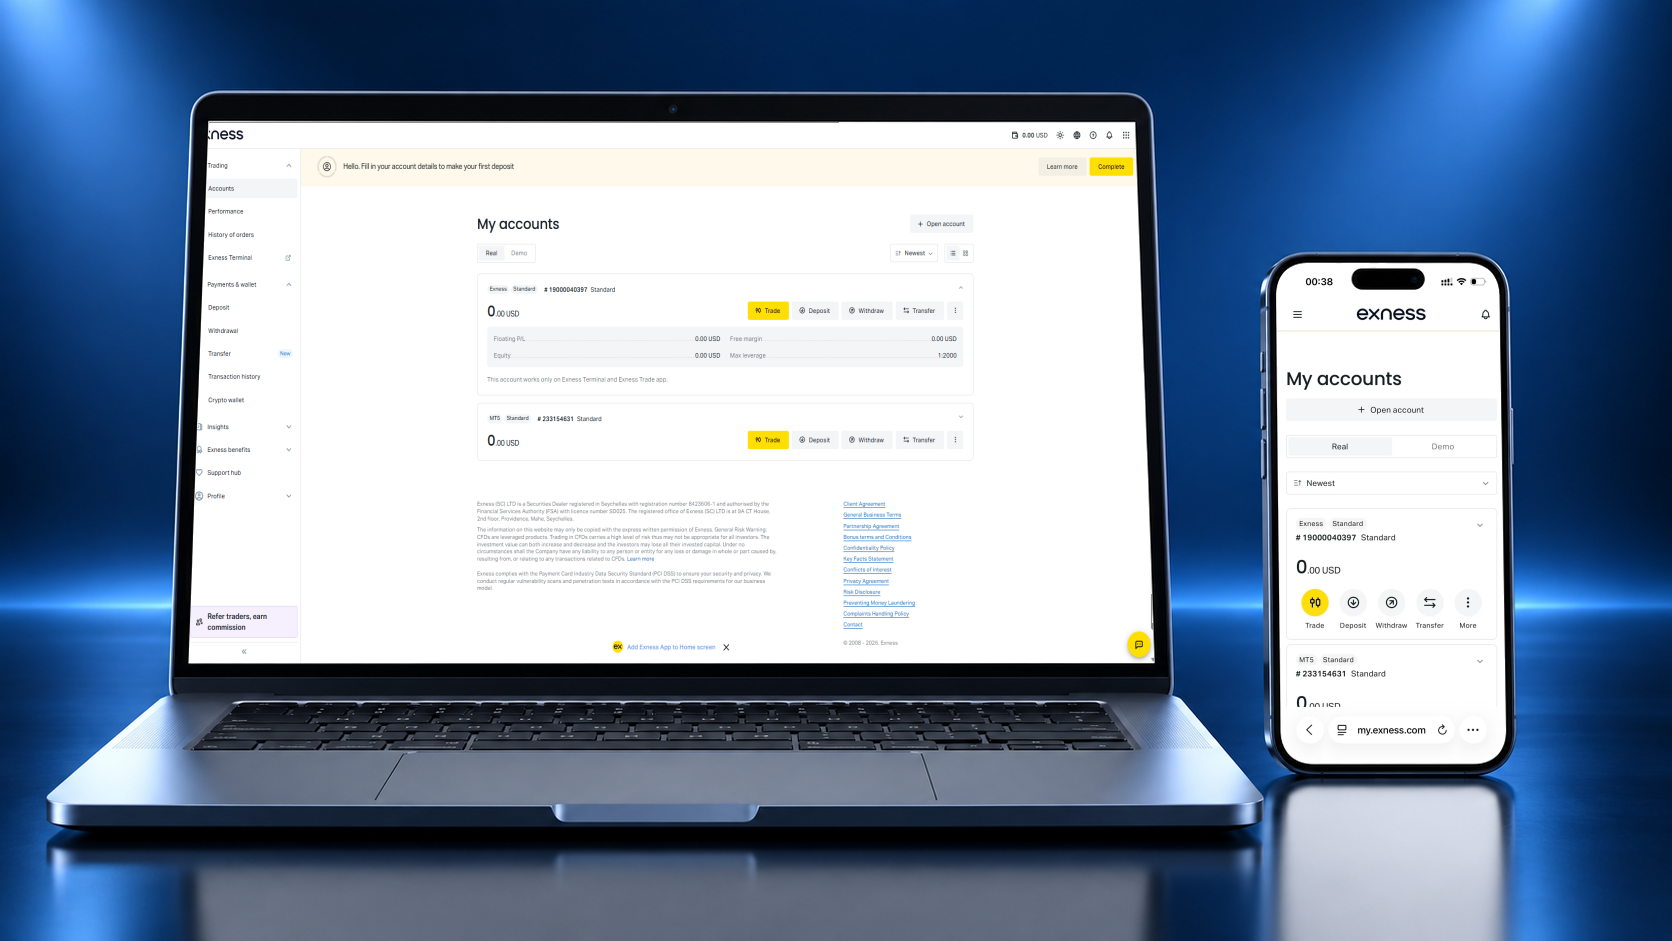
You'll notice that Exness gives you two options: Real Account and Demo Account. For this guide, make sure you select Real Account. A demo account is useful for practice, but it doesn't qualify for complimentary DaraForex VIP access — we need a real, funded account.
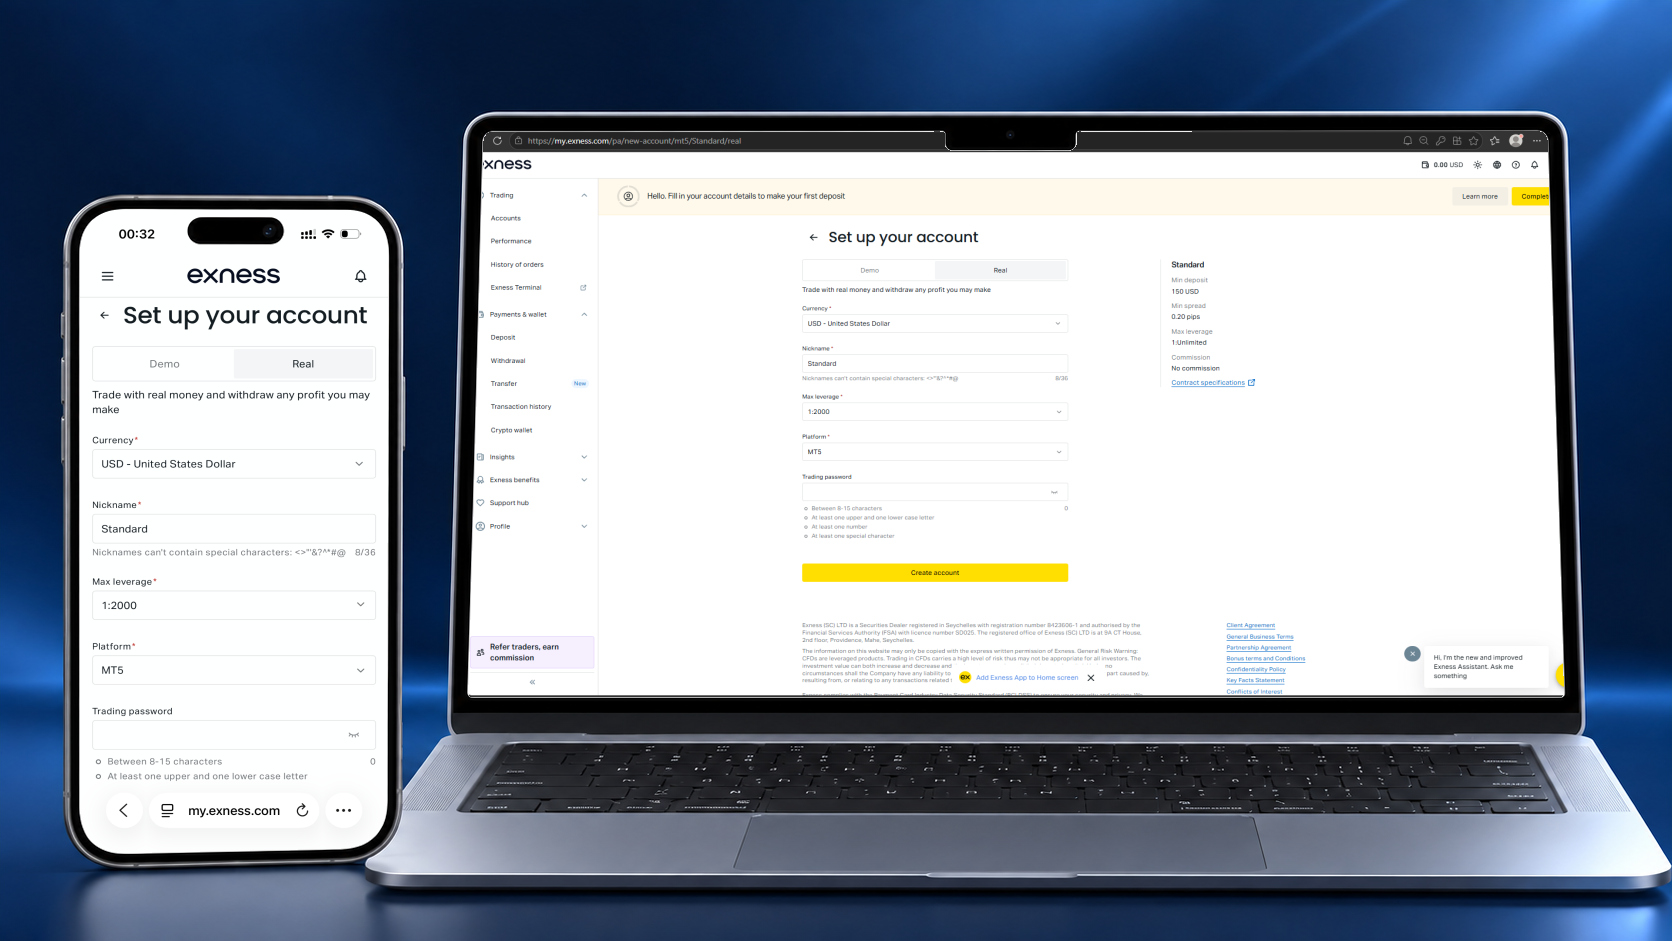
Choose your account currency. Pick the one you're most comfortable with. Important: once your account has been created, you cannot change its currency, so choose carefully.
Choose your leverage. Leverage determines your buying power. Higher leverage increases both potential profits and potential losses, so always use it responsibly.
Create your trading password. This is NOT the same as your Exness login password — it's used later when logging into MetaTrader, so store it safely. Finally, click Create Account.
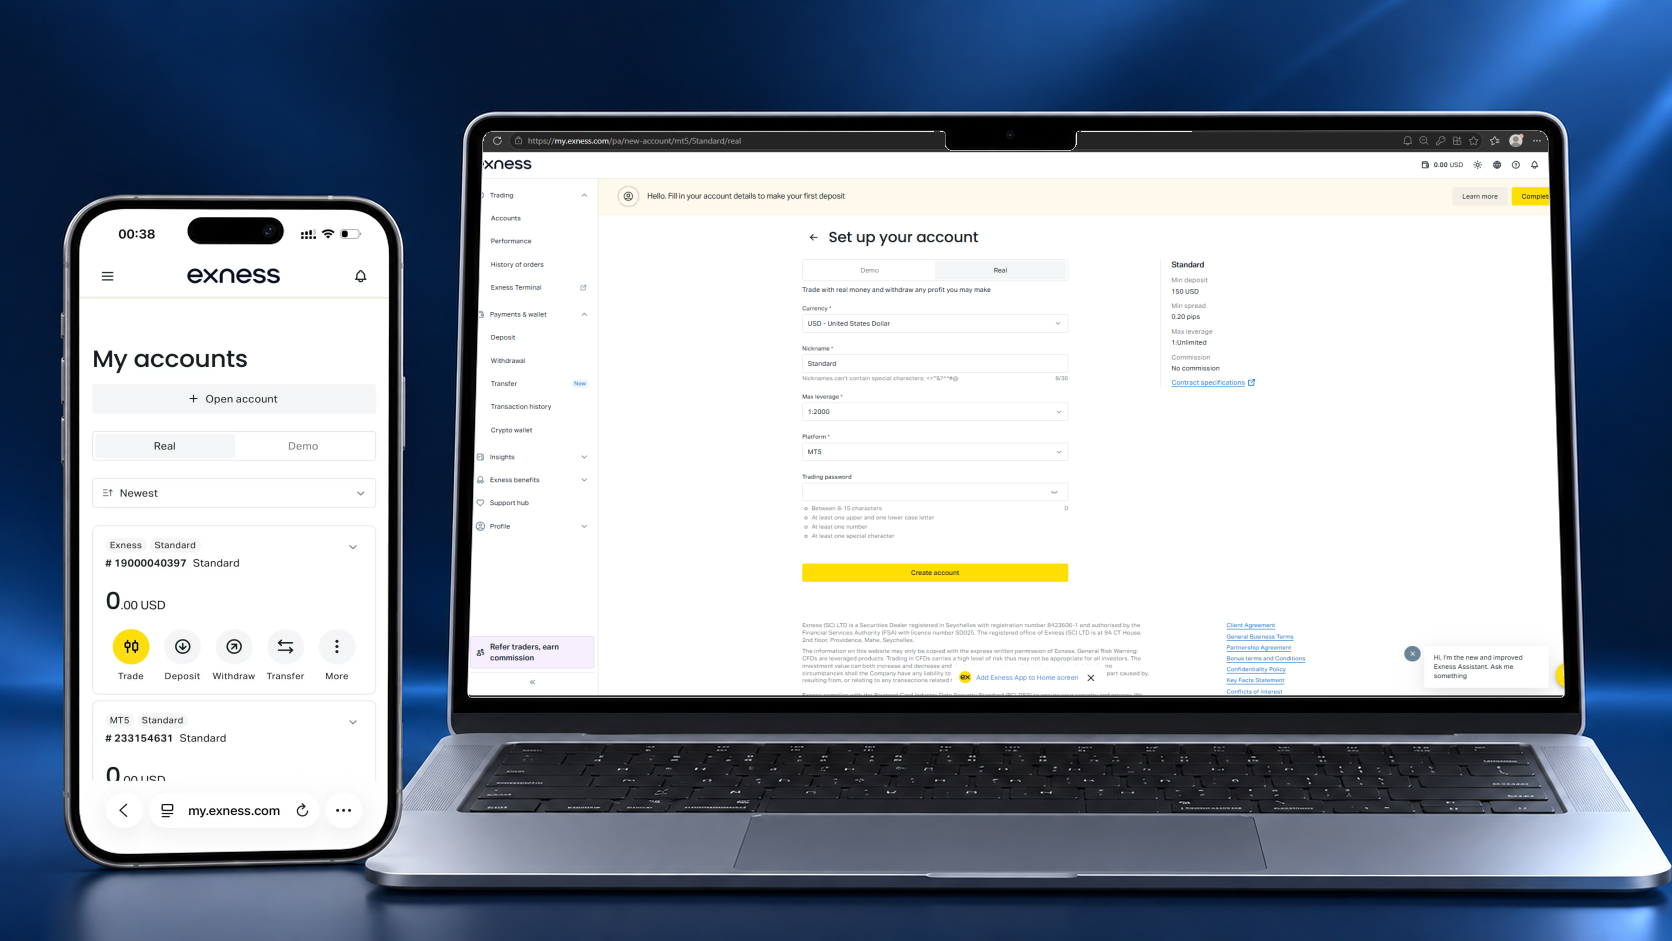
Step 3: Verify and Fund Your Account
Now that you've created your Real Trading Account, the next step is to verify your Exness account. Verification protects your account and allows you to deposit, withdraw, and trade without unnecessary restrictions. Simply upload the required documents and follow the instructions on your screen.
Once your account has been verified, it's time to fund it. One of the things we like most about Exness is the variety of payment methods available. Depending on your country, you can fund your account using mobile money, Visa or Mastercard, online banking, cryptocurrency, local payment methods, e-wallets, and several other convenient options.
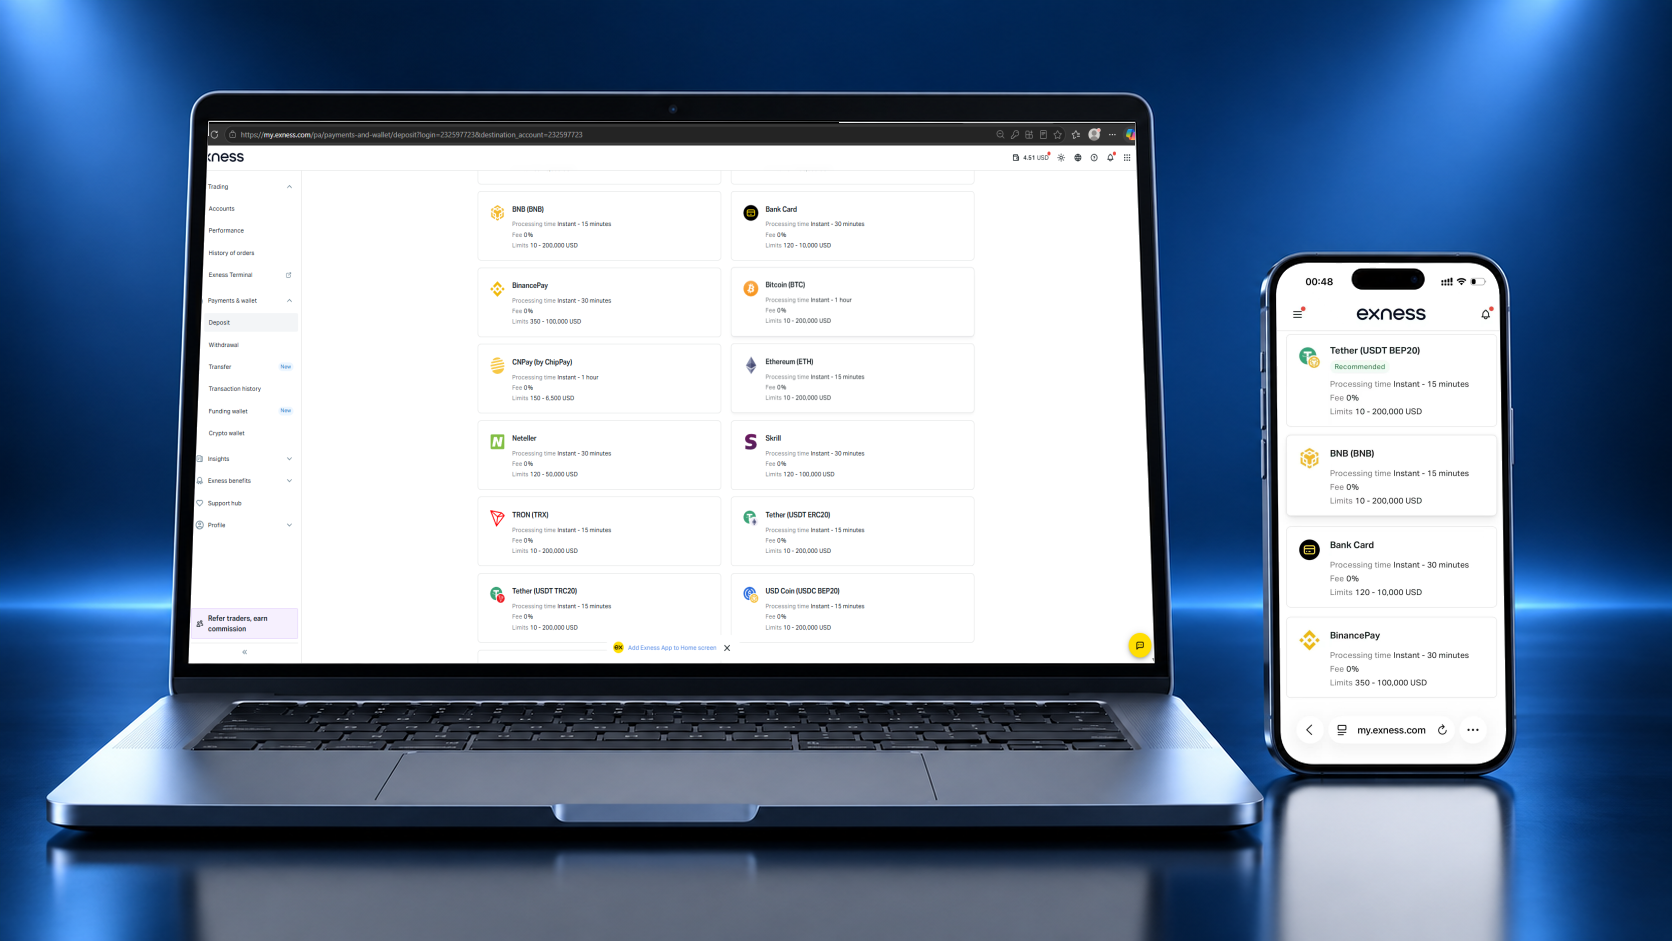
Choose the method that's most convenient for you, enter the amount, and complete the transaction. Deposit at least $200 — that's the threshold for complimentary DaraForex VIP access. Only trade with money you can comfortably afford to risk. Once your deposit reflects in your trading account, you're ready for the next step.
Step 4: Download MetaTrader 5 (MT5)
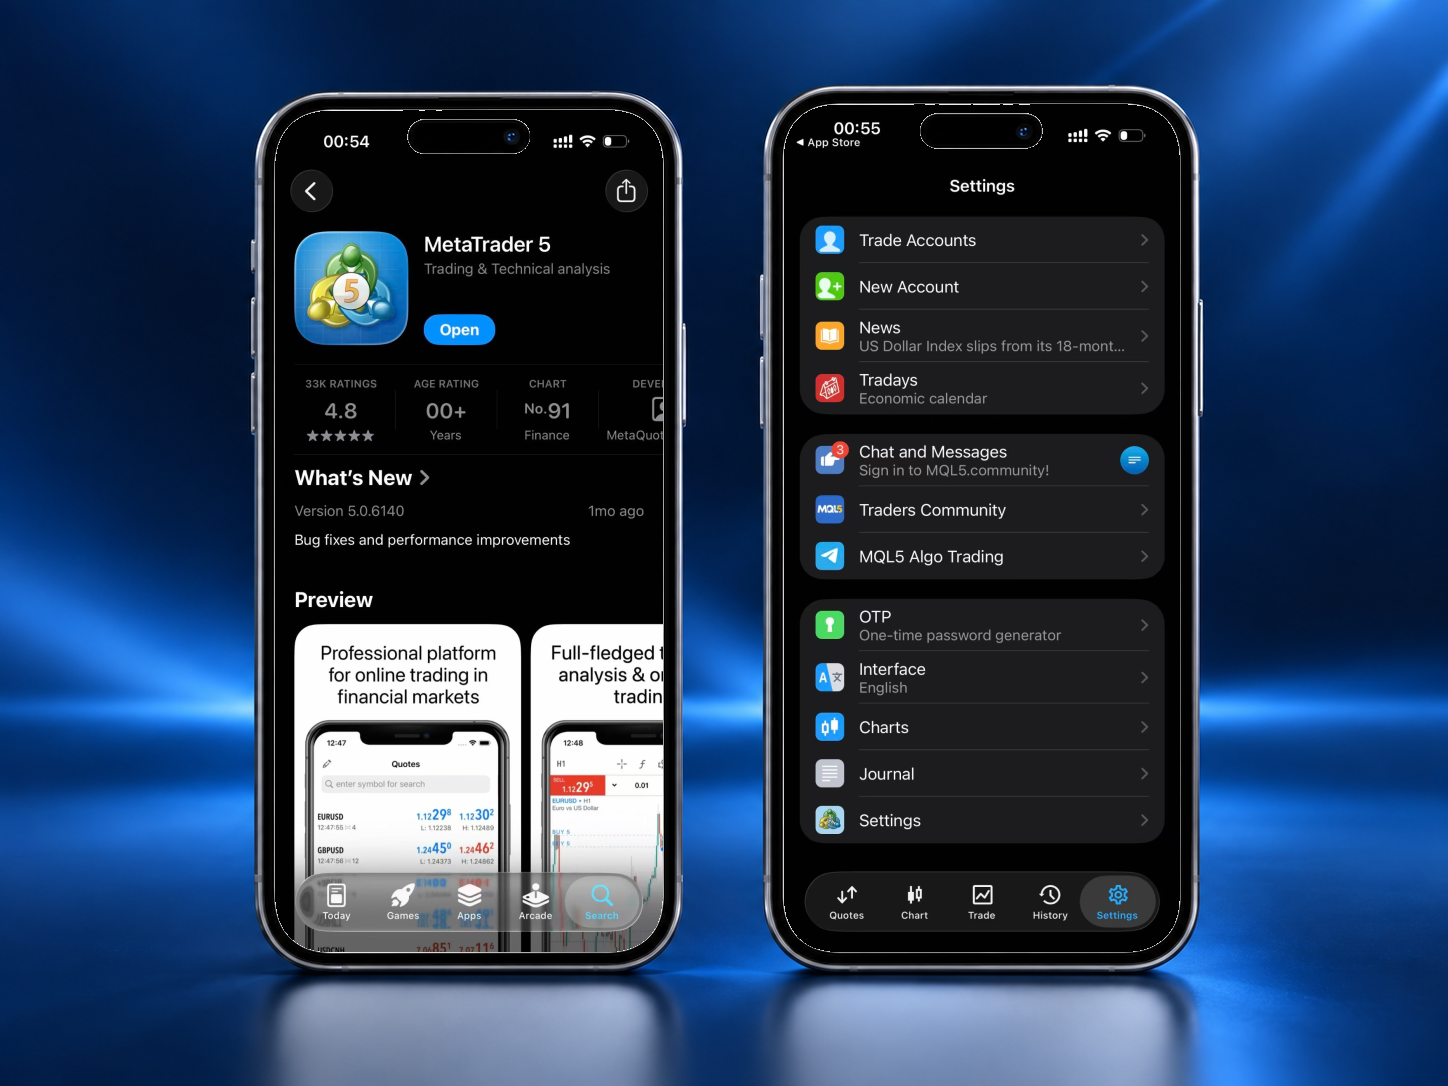
Now that your trading account has been funded, you'll need a trading platform. We'll be using MetaTrader 5 (MT5), one of the most popular trading platforms in the world. Download MT5 from the App Store (iOS) or Google Play (Android) — a desktop version is also available. Install it, then open the application.
Step 5: Log Into Your MT5 Trading Account
Now go back to your Exness Personal Area. Locate the Real Trading Account you created earlier and click on the ellipses button next to it.
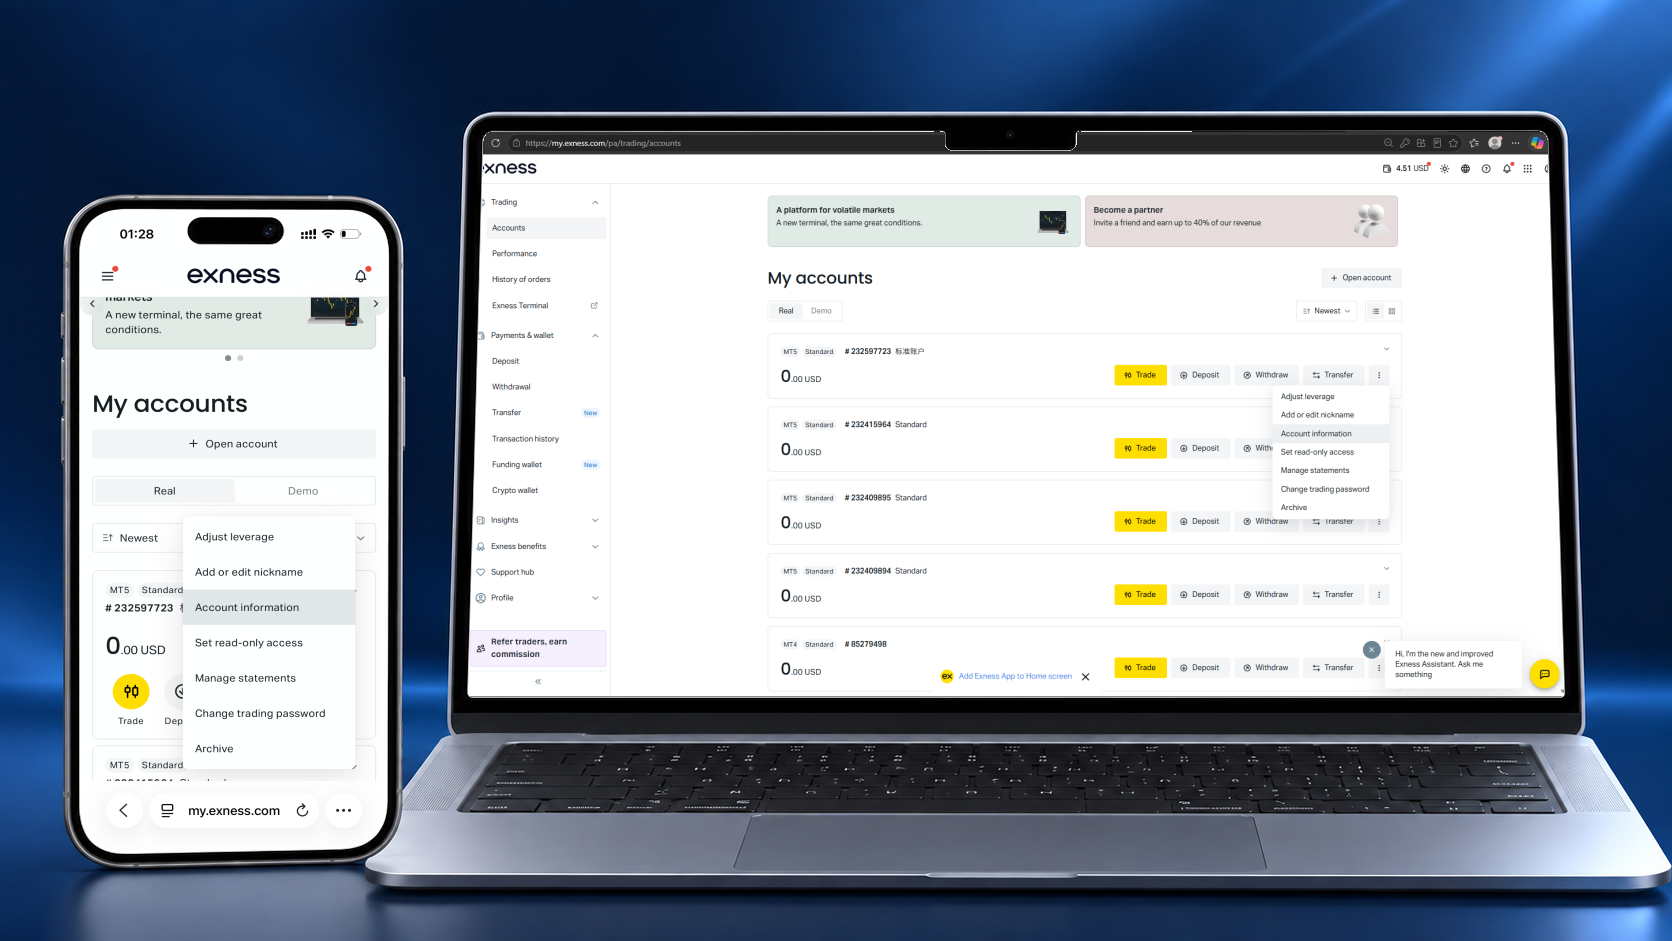
Click on "Account information", and you'll find the following details amongst the list: your MT5 Account Number (Login ID), your Trading Password, and your Trading Server.
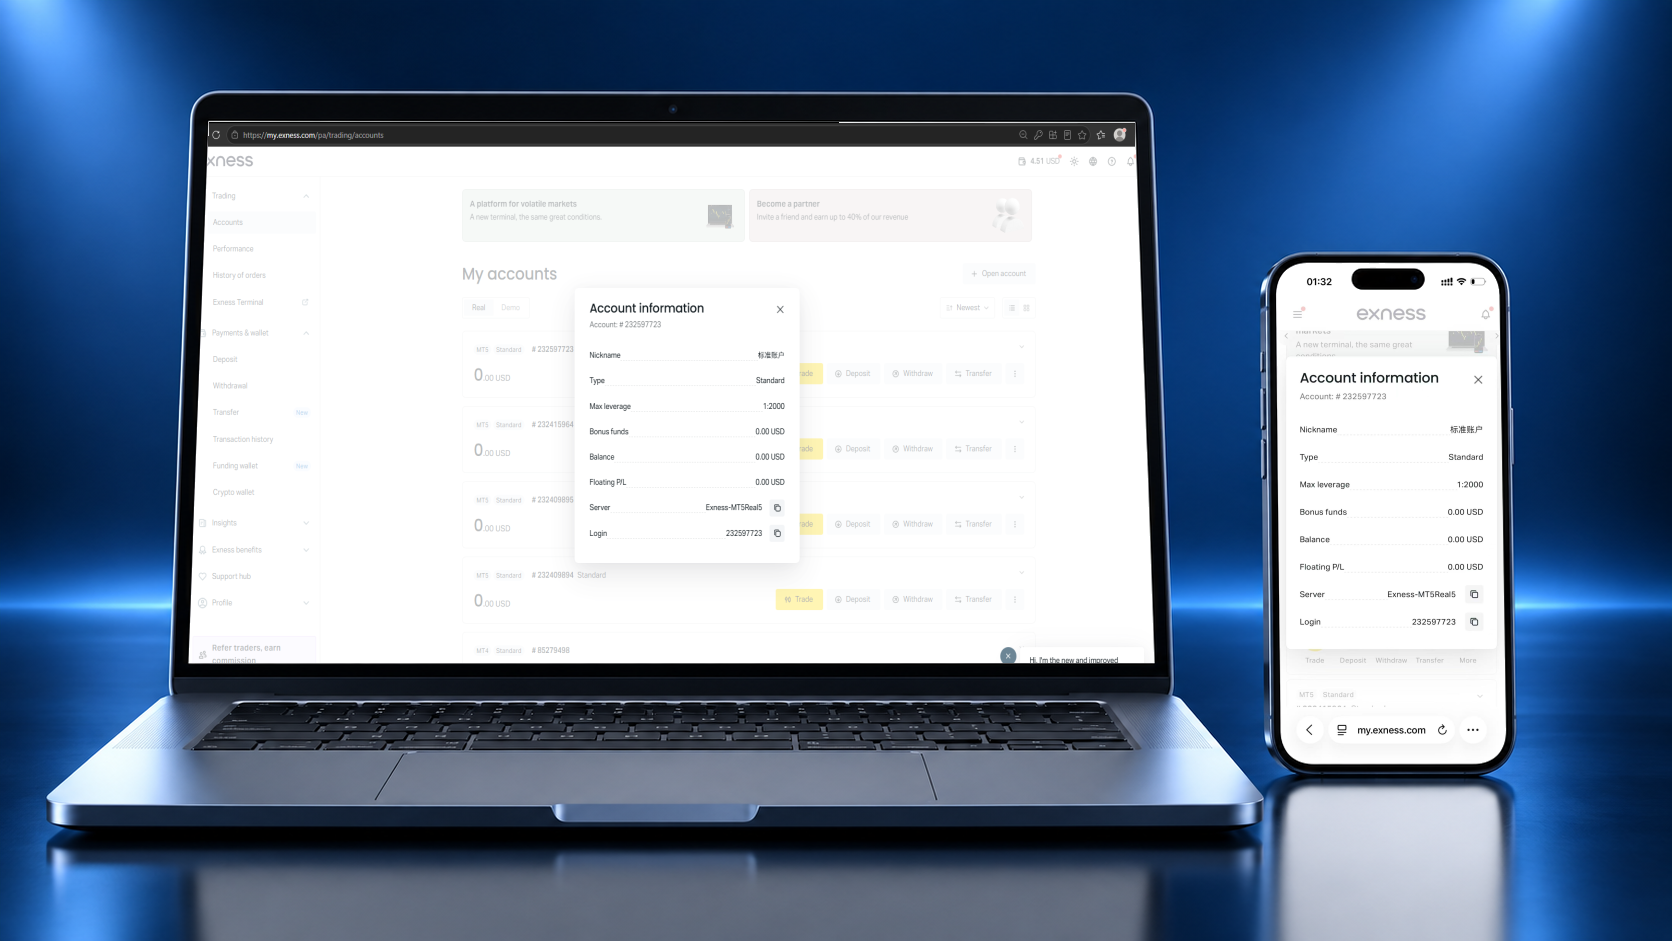
Return to MetaTrader 5. Click on Settings at the bottom left corner, then "Trade Accounts", then the "+" button at the top right. Search for "Exness Technologies Ltd", then search for the exact server displayed in your Exness account — for example Exness-MT5Real5.
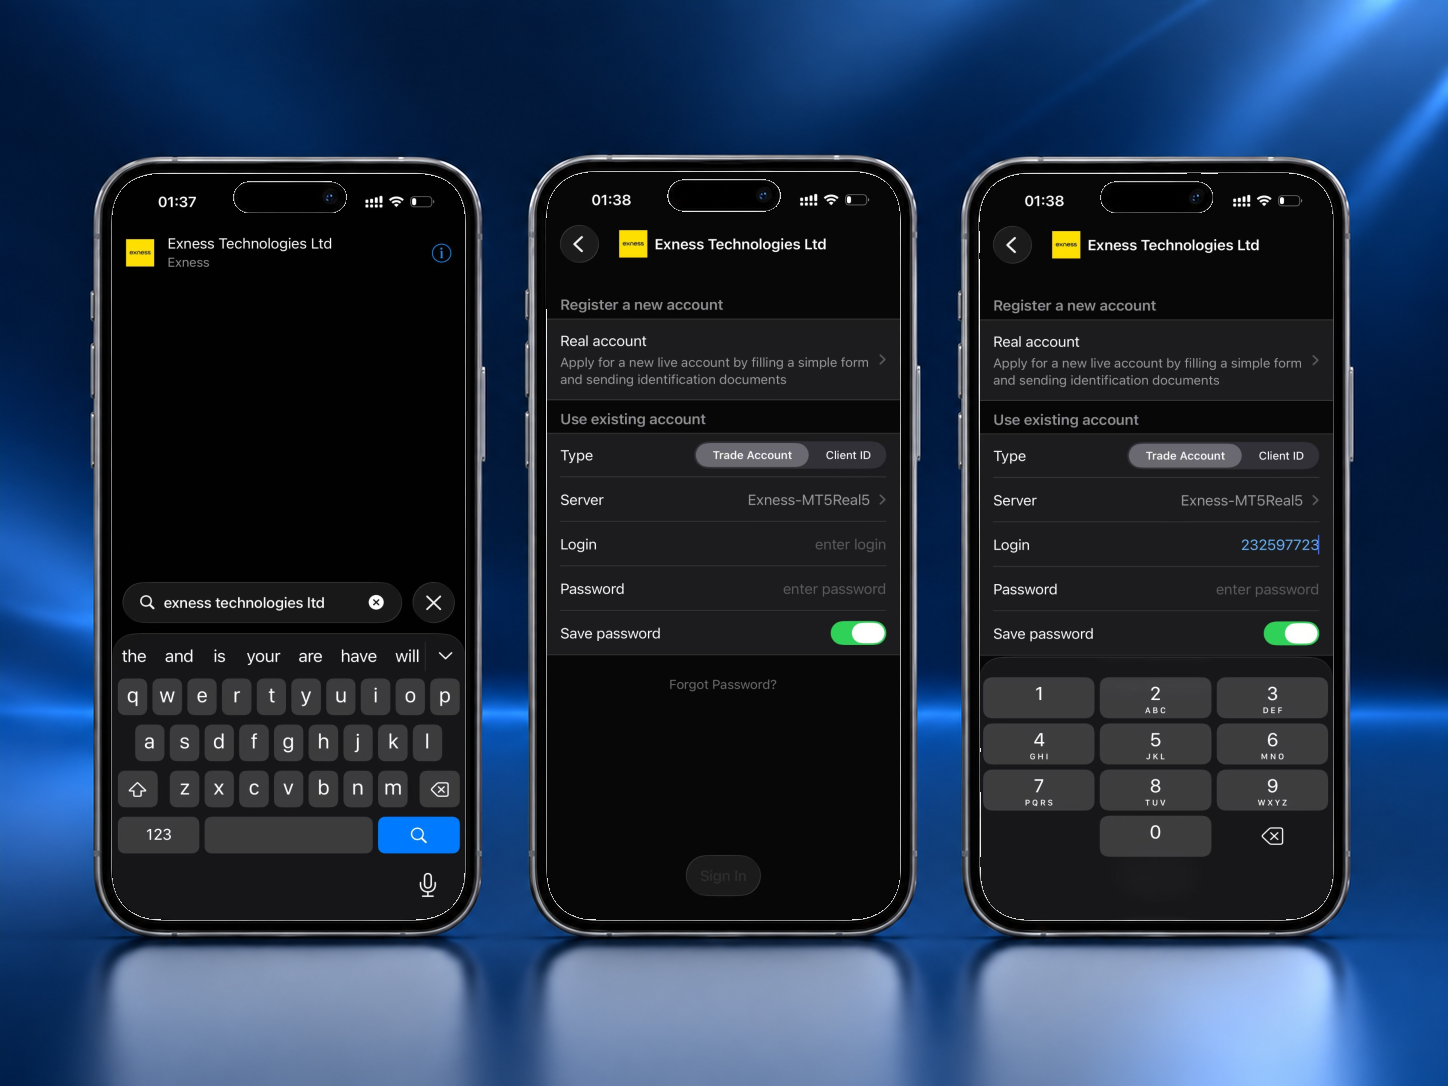
Enter your account number and trading password, then click Sign In. If everything has been entered correctly, you'll immediately see your balance. Congratulations — your trading account is now connected and ready to use.
Tip: if the balance shows zero, you most likely picked the wrong server — match the server name exactly.
Step 6: Return to DaraForex — Your VIP Unlocks
Congratulations! You've opened your broker account, created your Real Trading Account, funded it, downloaded MetaTrader 5, and connected everything successfully.
Now the most important step: your DaraForex access. Go back to the VIP page and click "Verify my account". Because you opened the account through our link, our system confirms your account and deposit with the partner broker automatically — approval is instant in most cases. Once approved, today's full Gold Market Radar, Trading with Dara, and your private VIP Telegram channel link unlock immediately.
Opening a trading account is easy. Trading consistently is what changes everything — that's why the radar exists. Welcome to DaraForex.